Fine-tune a Whisper TTS model with Unsloth and Deploy it to Koyeb
Introduction
What if your AI could literally speak with a new voice?
Over the past few years, Text-to-Speech (TTS) technology has evolved from the robotic tones of early voice assistants to natural, expressive speech that carries rhythm, character, and nuance. The most exciting part isn’t just how real these voices sound, it’s how easily developers can now fine-tune them to sound like any voice they choose.
With platforms like Unsloth, it’s possible to take an existing TTS model and train it on a curated dataset to recreate a specific speaking style or tone, in this case, something timeless: the voice of Sherlock Holmes himself. Unsloth supports multiple TTS models, including Sesame (a lightweight TTS model).
In this tutorial, we’ll walk through how to fine-tune a Sesame model with Unsloth, train it using public domain Sherlock Holmes audiobooks (transcribed with Whisper), and then deploy it as a fully functional TTS web app using FastAPI, Gradio, and Koyeb.
By the end, you’ll have your own cloud-hosted TTS model that can generate lifelike speech in the distinctive tone of a literary icon, built entirely with open-source tools.
Prerequisites
To complete the tutorial, you will need:
- Basic knowledge of Python and general TTS concepts.
- A Koyeb account for deploying Unsloth and the FastAPI/Gradio web app.
- A Hugging Face account to host and manage your fine-tuned model.
What we'll build
This tutorial covers the following steps:
- Preparing the Dataset
- Fine-tuning with Unsloth
- Creating the FastAPI Endpoint and Gradio UI
- Testing Your AI Voice
Understanding Unsloth’s TTS fine-tuning pipeline
Before writing any code, it’s important to understand how Unsloth manages the fine-tuning process for TTS models.
Unsloth simplifies what used to be a multi-step, resource-heavy workflow. Traditionally, fine-tuning a TTS model required manual setup for data pre-processing, GPU optimization, batching, and checkpointing. With Unsloth, you can upload your dataset, consisting of paired audio clips and transcripts, choose a supported model, and start training directly from your browser or a hosted runtime with minimal configuration.
For this tutorial, we’ll be fine-tuning a TTS model (Sesame) using Unsloth’s streamlined interface. We’ll also make use of a STT (Speech-to-Text) Model (Whisper), as a helper tool to prepare our dataset. Whisper’s strong transcription capabilities make it ideal for automatically generating or refining transcripts from raw audio, ensuring the dataset meets Unsloth’s fine-tuning requirements.
Once the dataset is ready, Unsloth will handle the rest, from batching and mixed precision training to checkpoint management, allowing us to focus on producing a clear, natural-sounding voice model with minimal setup.
Architecture
This project can be broken down into three main architectural components, the dataset preparation, model fine-tuning, and application deployment pipelines.
Each layer builds on the previous one to create a complete, end-to-end TTS system.
Dataset architecture
Goal: Convert raw audio into a structured dataset ready for fine-tuning.
Workflow:

Each entry in the dataset includes the audio file path and transcript in a TSV (Tab Separated Values) file.
Fine-tuning architecture
Goal: Train the model to reproduce the desired voice characteristics.
Workflow:

Unsloth handles batching, mixed-precision training, and automatic checkpoint management throughout this stage.
Application architecture
Goal: Deploy the fine-tuned model as a web-accessible TTS service.
Workflow:

The FastAPI backend exposes an API endpoint for text input, the Gradio interface provides an interactive demo for generating audio, which will be hosted in the cloud with Koyeb.
Preparing the dataset
Every great machine learning project starts with a great dataset, and in the world of Text-to-Speech, that means audio clips paired with their corresponding transcripts. To fine-tune a TTS model, Unsloth expects data in this exact format: one line per training example, containing both the path to an audio file and the spoken text within it.
For this tutorial, we’ll use one of the most recognizable voices in literature: the classic narration from The Adventures of Sherlock Holmes, available freely on LibriVox. LibriVox offers public domain audiobooks, which makes them ideal for model training, you can safely use them without worrying about copyright or licensing restrictions.
Step 1 - Download the audio
First, we install the necessary dependencies to handle audio processing and transcription.
# Install Dependencies
!pip install requests pydub openai-whisper
!echo "unsloth" | sudo -S apt update && sudo apt install -y ffmpeg
Next, we download the audio files from LibriVox. Here we only fetch the first chapter for demonstration:
import os
import requests
from pydub import AudioSegment
from pydub.silence import detect_nonsilent
import whisper

# LibriVox URLs (Only the first 3 Chapters of the book)
LIBRIVOX_URLS=[
"<https://www.archive.org/download/adventuressherlockholmes_v4_1501_librivox/adventuresofsherlockholmes_01_doyle_128kb.mp3>"
    ]

# Download the LibriVox URLs
for url in LIBRIVOX_URLS:
    # Create a directory to store the downloaded files
    filename = url.split("/")[-1]
    os.makedirs("audio_files", exist_ok=True)
    print(f"Downloading {filename}")
    response = requests.get(url)
    with open(f"audio_files/{filename}", "wb") as f:
        f.write(response.content)
        print(f"Downloaded {filename}")
This step ensures we have the raw audio ready for pre-processing.
Step 2 – Convert to WAV and split into chunks
Most TTS models require WAV format, so we first convert the downloaded MP3 files. We then split the audio into smaller chunks (~7 seconds) at natural pauses to improve transcription quality.
# Convert the audio files to WAV for
for file in os.listdir("audio_files"):
    if file.endswith(".mp3"):
        print(f"Converting {file} to WAV format")
        audio = AudioSegment.from_mp3(f"audio_files/{file}")
        audio.export(f"audio_files/{file.replace('.mp3', '.wav')}", format="wav")
        print(f"Converted {file} to WAV format")

# Split the audio files into chunks at natural pauses (silence)
target_chunk_length_ms = 7 * 1000  # Target 7 seconds per chunk
min_silence_len = 500  # Minimum silence length in ms to be considered a pause
silence_thresh = -40  # Silence threshold in dBFS (adjust if needed)

for file in os.listdir("audio_files"):
    if file.endswith(".wav") and not "chunk" in file:
        audio = AudioSegment.from_wav(f"audio_files/{file}")
        print(f"Processing {file}, duration: {len(audio)/1000:.2f} seconds")
        # Detect non-silent chunks
        print("Detecting non-silent chunks")
        nonsilent_ranges = detect_nonsilent(audio, min_silence_len=min_silence_len, silence_thresh=silence_thresh)
        if not nonsilent_ranges:
            print(f"Warning: No speech detected in {file}")
            continue
        # Group non-silent ranges into chunks of approximately target_chunk_length_ms
        print("Grouping non-silent ranges into chunks")
        chunks = []
        current_chunk_start = nonsilent_ranges[0][0]
        current_chunk_end = nonsilent_ranges[0][1]
        for start, end in nonsilent_ranges[1:]:
            # Check if adding this segment would exceed target length
            if end - current_chunk_start > target_chunk_length_ms:
                # Save current chunk and start a new one
                print("Saving current chunk")
                chunks.append((current_chunk_start, current_chunk_end))
                current_chunk_start = start
                current_chunk_end = end
            else:
                # Extend current chunk
                current_chunk_end = end
        # Add the last chunk
        print("Adding last chunk")
        chunks.append((current_chunk_start, current_chunk_end))
        # Export chunks
        for i, (start, end) in enumerate(chunks):
            chunk = audio[start:end]
            chunk_name = f"audio_files/{file.replace('.wav', '')}_chunk_{i:03d}.wav"
            chunk.export(chunk_name, format="wav")
            print(f"Exported chunk {i} from {file} ({len(chunk)/1000:.2f} seconds, {start/1000:.2f}s - {end/1000:.2f}s)")
        print(f"Finished splitting {file} into {len(chunks)} chunks")
This approach preserves natural speech boundaries, helping Whisper generate more accurate transcripts.
Step 4 - Transcribe and generate the dataset
Now we use Whisper to transcribe each audio chunk and create a dataset file (TSV) that pairs audio with text.
# Transcribe the audio files
whisper_model = whisper.load_model("medium.en")
for file in os.listdir("audio_files"):
    if file.endswith(".wav") and "chunk" in file:
        print(f"Transcribing {file}")
        filename = file.replace(".wav", ".txt")
        result = whisper_model.transcribe(f"audio_files/{file}")
        with open(f"audio_files/{filename}", "w") as f:
            f.write(result["text"])
        print(f"Transcribed {filename}")

# Generate the dataset into a TSV file with the following columns: filename, text
tsv_file = "dataset.tsv"
with open(tsv_file, "w") as f:
    f.write("audio\\ttext\\n")
    for file in os.listdir("audio_files"):
        if file.endswith(".txt"):
            wav_file = file.replace(".txt", ".wav")
            wav_file = "audio_files/" + wav_file
            with open(f"audio_files/{file}", "r") as fr:
                text = fr.read()
            f.write(f"{wav_file}\\t{text}\\n")
            print(f"Added {wav_file} to {tsv_file}")
print(f"Finished generating {tsv_file}")
This produces a ready-to-use dataset with audio-transcript pairs suitable for fine-tuning a TTS model in Unsloth.
Run it on Koyeb
Koyeb makes it easy to run Unsloth in the cloud without managing servers. You can deploy the official Unsloth Docker image and run your TTS workflow directly.
Start by visiting the one-click Unsloth deployment page: https://www.koyeb.com/deploy/unsloth.
This page uses the official unsloth/unsloth Docker image preconfigured with all necessary dependencies.
Click “Deploy” on the Koyeb Unsloth deployment page. If you’re not logged in, Koyeb will prompt you to log in or create an account.
For the deployment options, you can accept the defaults.
Choose a value for JUPYTER_PASSWORD in the Environment variables section of the Koyeb control panel for your Service. This password is how you access the environment through HTTPS.
After setting these, click Deploy to start the service. Koyeb will then provision the service, set up the Docker container, and start your Unsloth instance automatically.
Once the Unsloth server is deployed, you can access the Instance using your Koyeb App URL, which is similar to: https://<YOUR_APP_NAME>-<YOUR_KOYEB_ORG>.koyeb.app.
Enter the password you defined earlier:
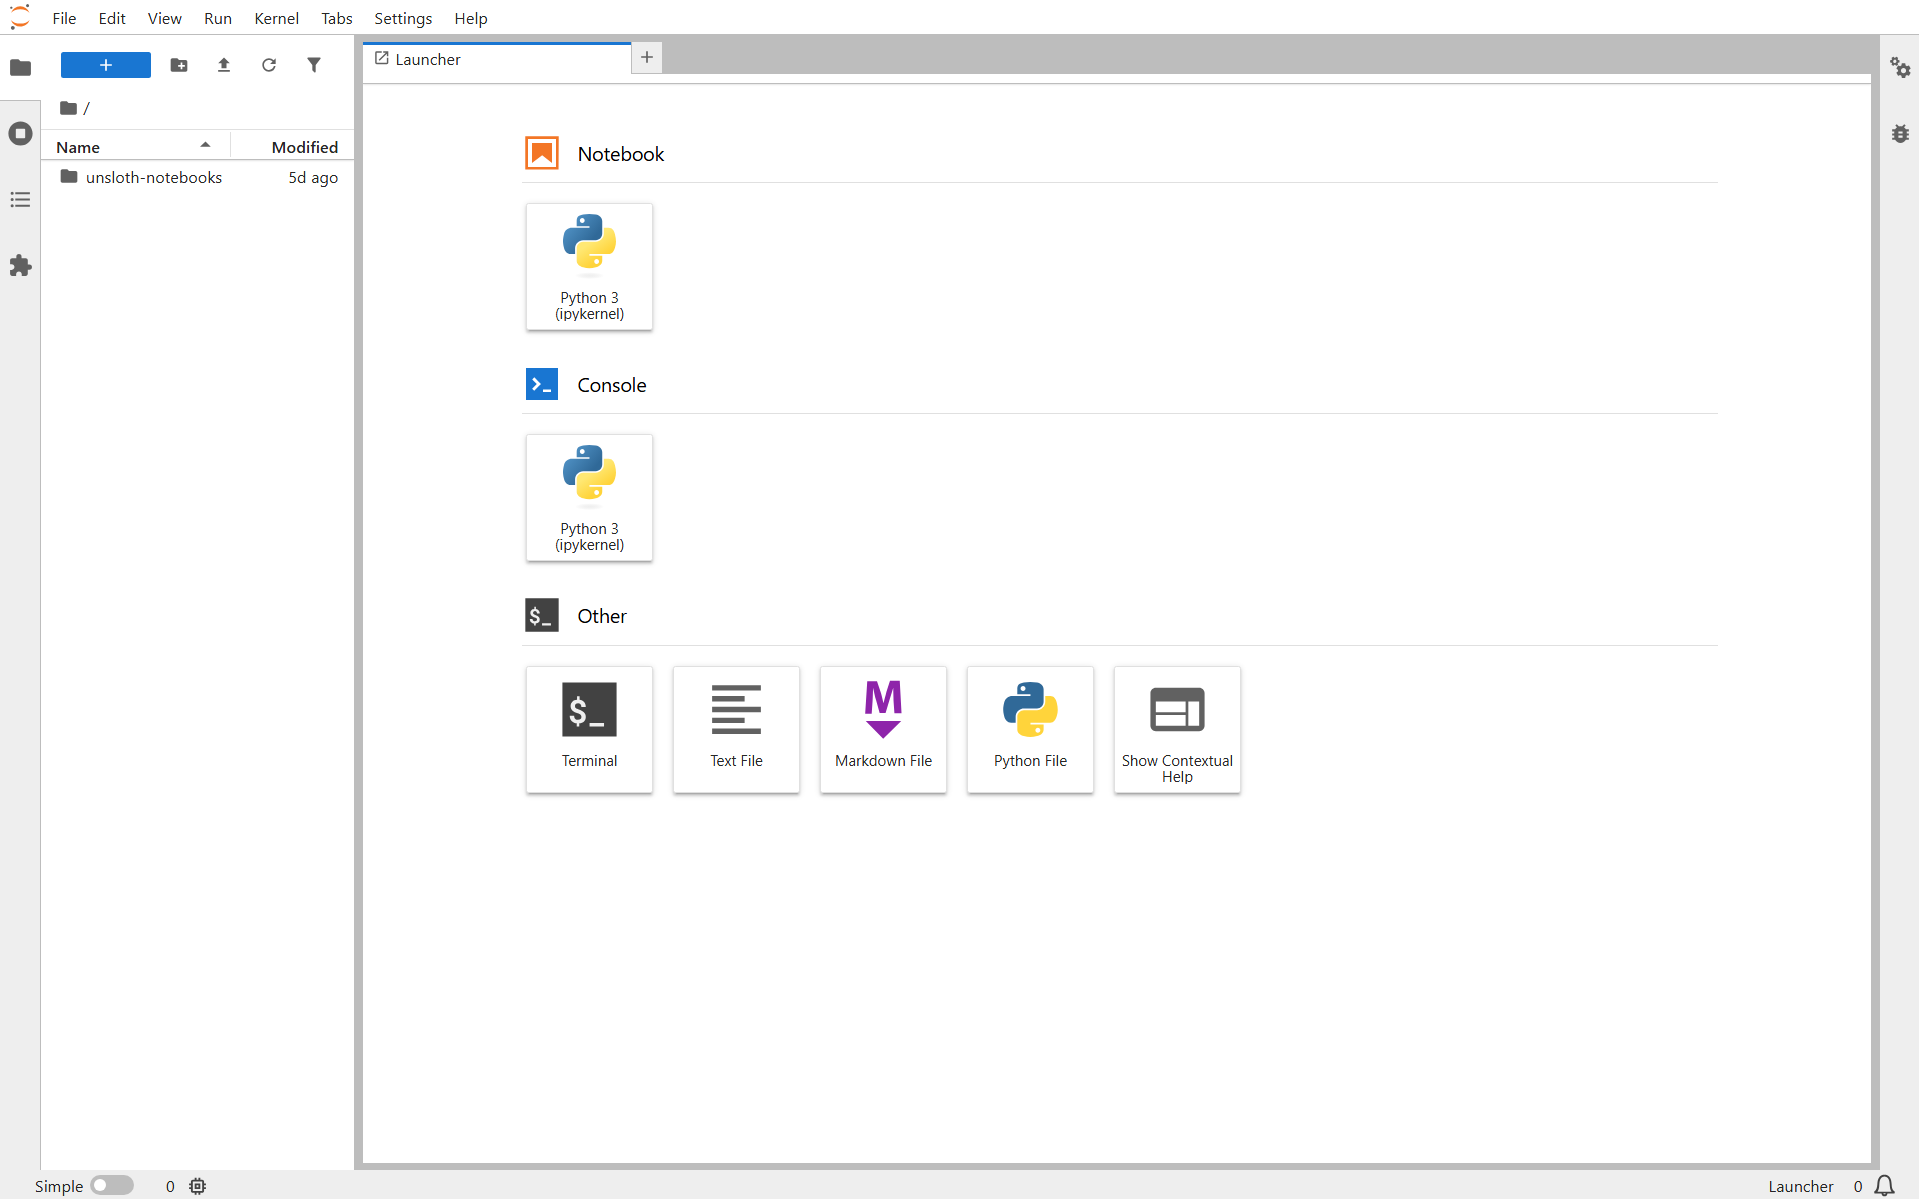
Create a new notebook:
Alternatively, you can use the notebook directly from here.
Run the notebook:

After a few minutes, the dataset will be prepared and ready for fine-tuning:

Ethical and licensing considerations
Using public domain audio like LibriVox ensures that your dataset is safe to use and share. Avoid commercial recordings, copyrighted podcasts, or celebrity voices, these raise both legal and ethical concerns. Public domain works let you explore fine-tuning freely while staying on the right side of data use practices.
Fine-tuning with Unsloth
In this section, we take the Unsloth example notebook for fine-tuning the Sesame model and adapt it to use our custom dataset prepared from the Sherlock Holmes audio.
Step 1 - Load the model
Before we start fine-tuning, we need to ensure the environment can properly handle audio processing inside the Unsloth Docker image.
For that, install the torchcodec library:
!pip install torchcodec
This allows the notebook to correctly read and process audio files for TTS training.
Once the environment is ready, we can load the Sesame model using Unsloth’s FastModel class. We also apply PEFT (Parameter-Efficient Fine-Tuning) to reduce memory usage and enable longer sequences during training.
from unsloth import FastModel
from transformers import CsmForConditionalGeneration
import torch

model, processor = FastModel.from_pretrained(
    model_name = "unsloth/csm-1b",
    max_seq_length= 2048, # Choose any for long context!
    dtype = None, # Leave as None for auto-detection
    auto_model = CsmForConditionalGeneration,
    load_in_4bit = False, # Select True for 4bit - reduces memory usage
)

model = FastModel.get_peft_model(
    model,
    r = 32, # Choose any number > 0 ! Suggested 8, 16, 32, 64, 128
    target_modules = ["q_proj", "k_proj", "v_proj", "o_proj",
                      "gate_proj", "up_proj", "down_proj",],
    lora_alpha = 32,
    lora_dropout = 0, # Supports any, but = 0 is optimized
    bias = "none",    # Supports any, but = "none" is optimized
    # [NEW] "unsloth" uses 30% less VRAM, fits 2x larger batch sizes!
    use_gradient_checkpointing = "unsloth", # True or "unsloth" for very long context
    random_state = 3407,
    use_rslora = False,  # We support rank stabilized LoRA
    loftq_config = None, # And LoftQ
)
Explanation:
FastModel.from_pretrainedloads the prebuilt Sesame model.get_peft_modelapplies LoRA-based fine-tuning to reduce memory usage and enable longer context lengths.
Step 2 - Prepare the dataset
We load the dataset generated earlier (dataset.tsv), map audio file paths, ensure speaker consistency, and process each example into tensors suitable for the model.
# Dataset Prep functions
from datasets import load_dataset, Audio, Dataset
import os
from transformers import AutoProcessor
from pathlib import Path

# Load model
processor = AutoProcessor.from_pretrained("unsloth/csm-1b")

# Load the TSV dataset
raw_ds = load_dataset("csv", data_files="dataset.tsv", delimiter="\\t", split="train")
# Resolve the path of the audio filename
raw_ds = raw_ds.map(lambda x: {"audio": str(Path(x["audio"]).resolve())})

# Getting the speaker id is important for multi-speaker models and speaker consistency
speaker_key = "source"
if "source" not in raw_ds.column_names and "speaker_id" not in raw_ds.column_names:
    print("Unsloth: No speaker found, adding default \\"source\\" of 0 for all examples")
    new_column = ["0"] * len(raw_ds)
    raw_ds = raw_ds.add_column("source", new_column)
elif "source" not in raw_ds.column_names and "speaker_id" in raw_ds.column_names:
    speaker_key = "speaker_id"

# Convert the audio path to an Audio file
target_sampling_rate = 24000
raw_ds = raw_ds.cast_column("audio", Audio(sampling_rate=target_sampling_rate))

def preprocess_example(example):
    conversation = [
        {
            "role": str(example[speaker_key]),
            "content": [
                {"type": "text", "text": example["text"]},
                {"type": "audio", "path": example["audio"]["array"]},
            ],
        }
    ]

    try:
        model_inputs = processor.apply_chat_template(
            conversation,
            tokenize=True,
            return_dict=True,
            output_labels=True,
            text_kwargs = {
                "padding": "max_length", # pad to the max_length
                "max_length": 256, # this should be the max length of audio
                "pad_to_multiple_of": 8,
                "padding_side": "right",
            },
            audio_kwargs = {
                "sampling_rate": 24_000,
                "max_length": 265633, # max input_values length of the whole dataset
                "padding": "max_length",
            },
            common_kwargs = {"return_tensors": "pt"},
        )
    except Exception as e:
        print(f"Error processing example with text '{example['text'][:50]}...': {e}")
        return None

    required_keys = ["input_ids", "attention_mask", "labels", "input_values", "input_values_cutoffs"]
    processed_example = {}
    # print(model_inputs.keys())
    for key in required_keys:
        if key not in model_inputs:
            print(f"Warning: Required key '{key}' not found in processor output for example.")
            return None

        value = model_inputs[key][0]
        processed_example[key] = value
    # Final check (optional but good)
    if not all(isinstance(processed_example[key], torch.Tensor) for key in processed_example):
         print(f"Error: Not all required keys are tensors in final processed example. Keys: {list(processed_example.keys())}")
         return None

    return processed_example

processed_ds = raw_ds.map(
    preprocess_example,
    remove_columns=raw_ds.column_names,
    desc="Preprocessing dataset",
)
Explanation:
- Converts audio + text pairs into model-ready tensors.
- Handles padding/truncation for both text and audio.
- Ensures consistent speaker information for multi-speaker models.
The max_length parameter for the audio input is set to the maximum length of the dataset. This tells the processor the maximum number of audio samples it should expect per example.
If the dataset contains longer or shorter sequences, you may encounter errors like:
ValueError: expected sequence of length X at dim 1 (got Y)
Adjust max_length to match the longest audio sequence in your dataset, normally you can use the value 'X' return in the error message.
This ensures that every audio input is properly padded or truncated to the correct length and prevents dimension errors when feeding data to the model.
Step 3 - Train the model
Finally, we define a Hugging Face Trainer to fine-tune the model on our custom dataset.
from transformers import TrainingArguments, Trainer
from unsloth import is_bfloat16_supported

# Define a Trainer
trainer = Trainer(
    model = model,
    train_dataset = processed_ds,
    args = TrainingArguments(
        per_device_train_batch_size = 2,
        gradient_accumulation_steps = 4,
        warmup_steps = 5,
        num_train_epochs=1,
        learning_rate = 2e-4,
        fp16 = not is_bfloat16_supported(),
        bf16 = is_bfloat16_supported(),
        logging_steps = 1,
        optim = "adamw_8bit",
        weight_decay = 0.01, # Turn this on if overfitting
        lr_scheduler_type = "linear",
        seed = 3407,
        output_dir = "outputs",
        report_to = "none", # Use this for WandB etc
    ),
)

# Train the model
trainer_stats = trainer.train()

# Save to HF
model.save_pretrained_merged("SesameSherlockHolmes", processor, save_method = "merged_16bit",)
model.push_to_hub_merged("username/SesameSherlockHolmes", processor, save_method = "merged_16bit", token = "")
Explanation:
Trainerhandles batching, optimization, and logging.- Supports mixed precision (
fp16/bf16) for faster training. - After training, the model and processor are uploaded to Hugging Face Hub for easy deployment.
Before pushing your fine-tuned model and processor to Hugging Face, make sure you define your Hugging Face username and access token. This ensures the model is uploaded to the correct account.
Run it on Koyeb
Now let’s see the fine-tuning in action. We’ll use the previously deployed Unsloth instance, which already has the dataset TSV and audio files prepared and ready for training.
Create a new notebook, or use the notebook from here.
Run the notebook, and it will first start downloading the base model:
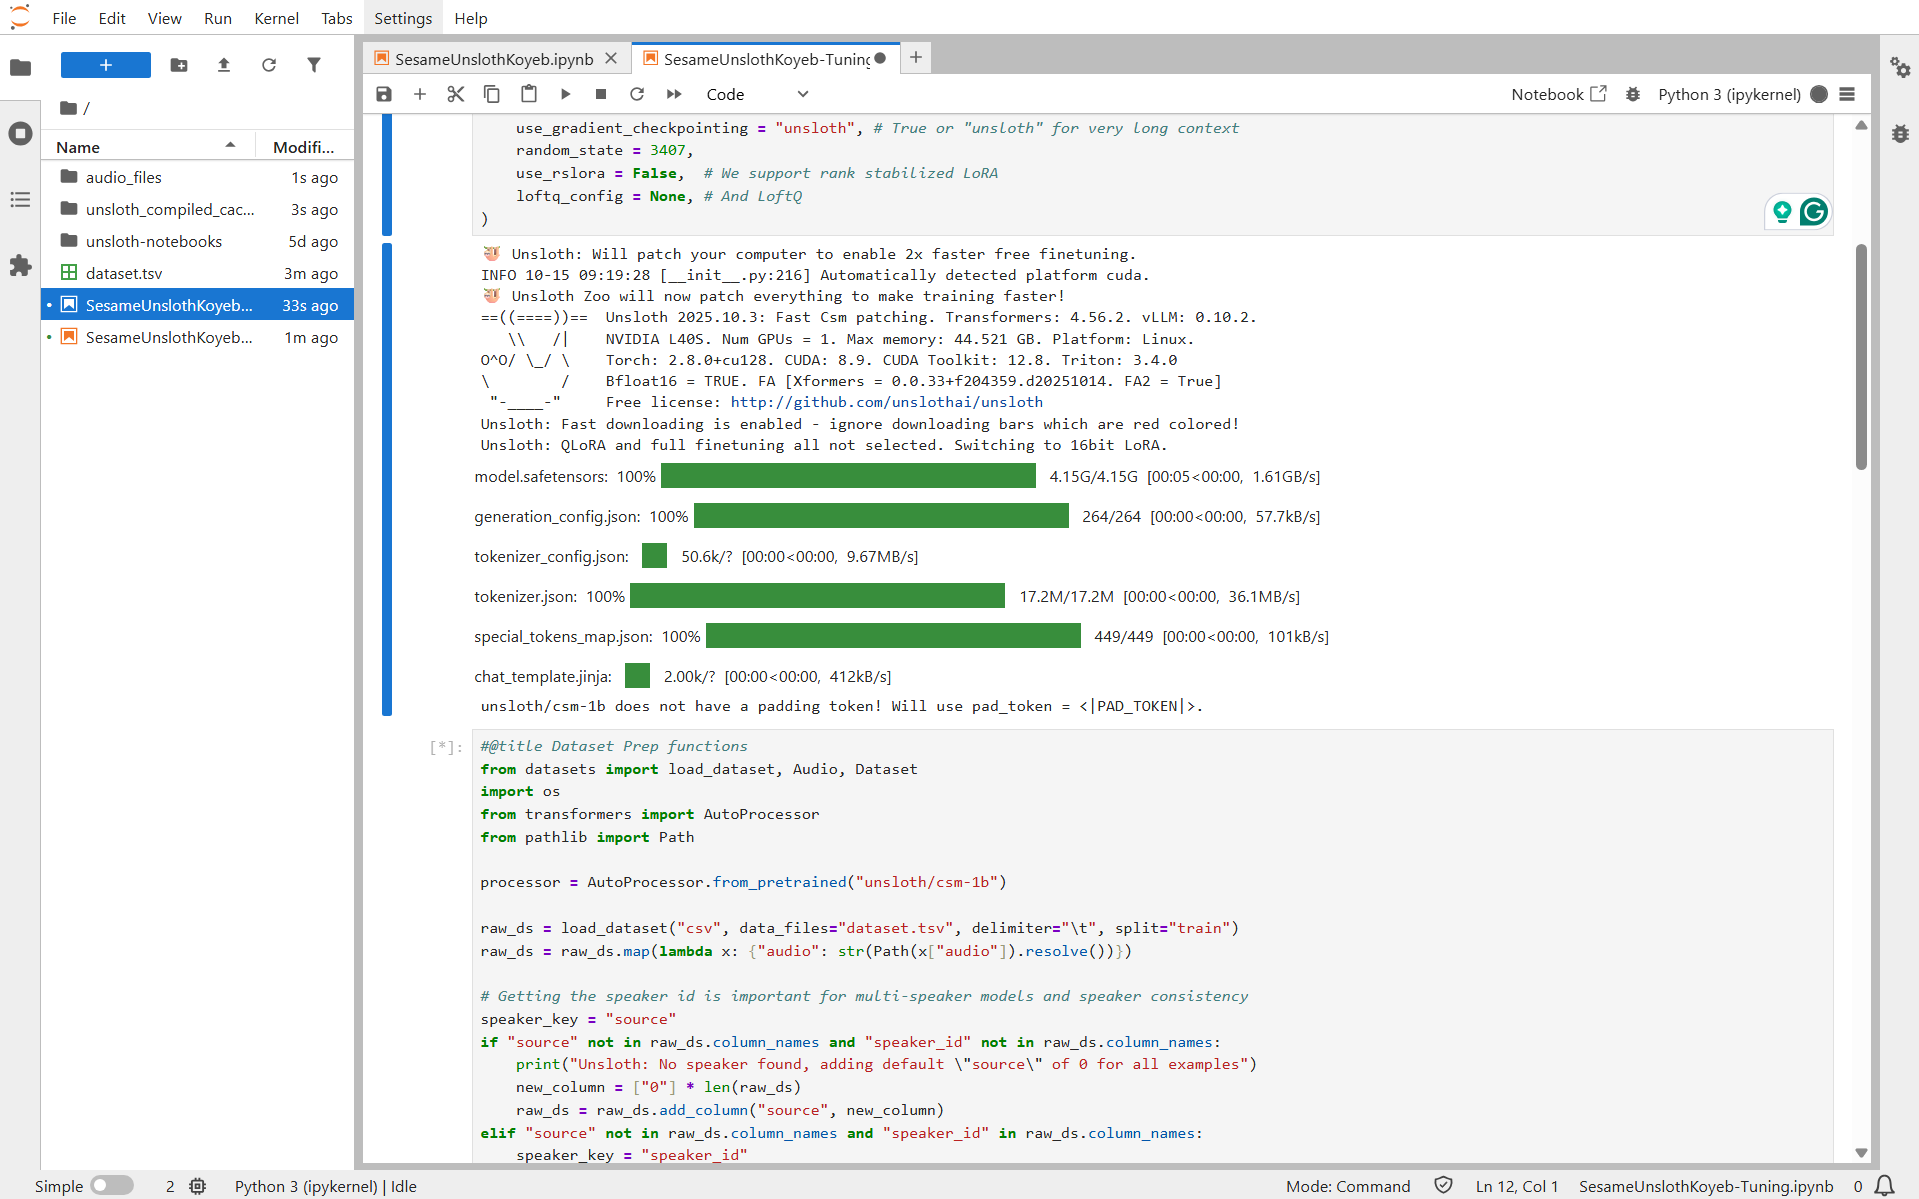
Once the dataset is processed, the fine-tuning begins:
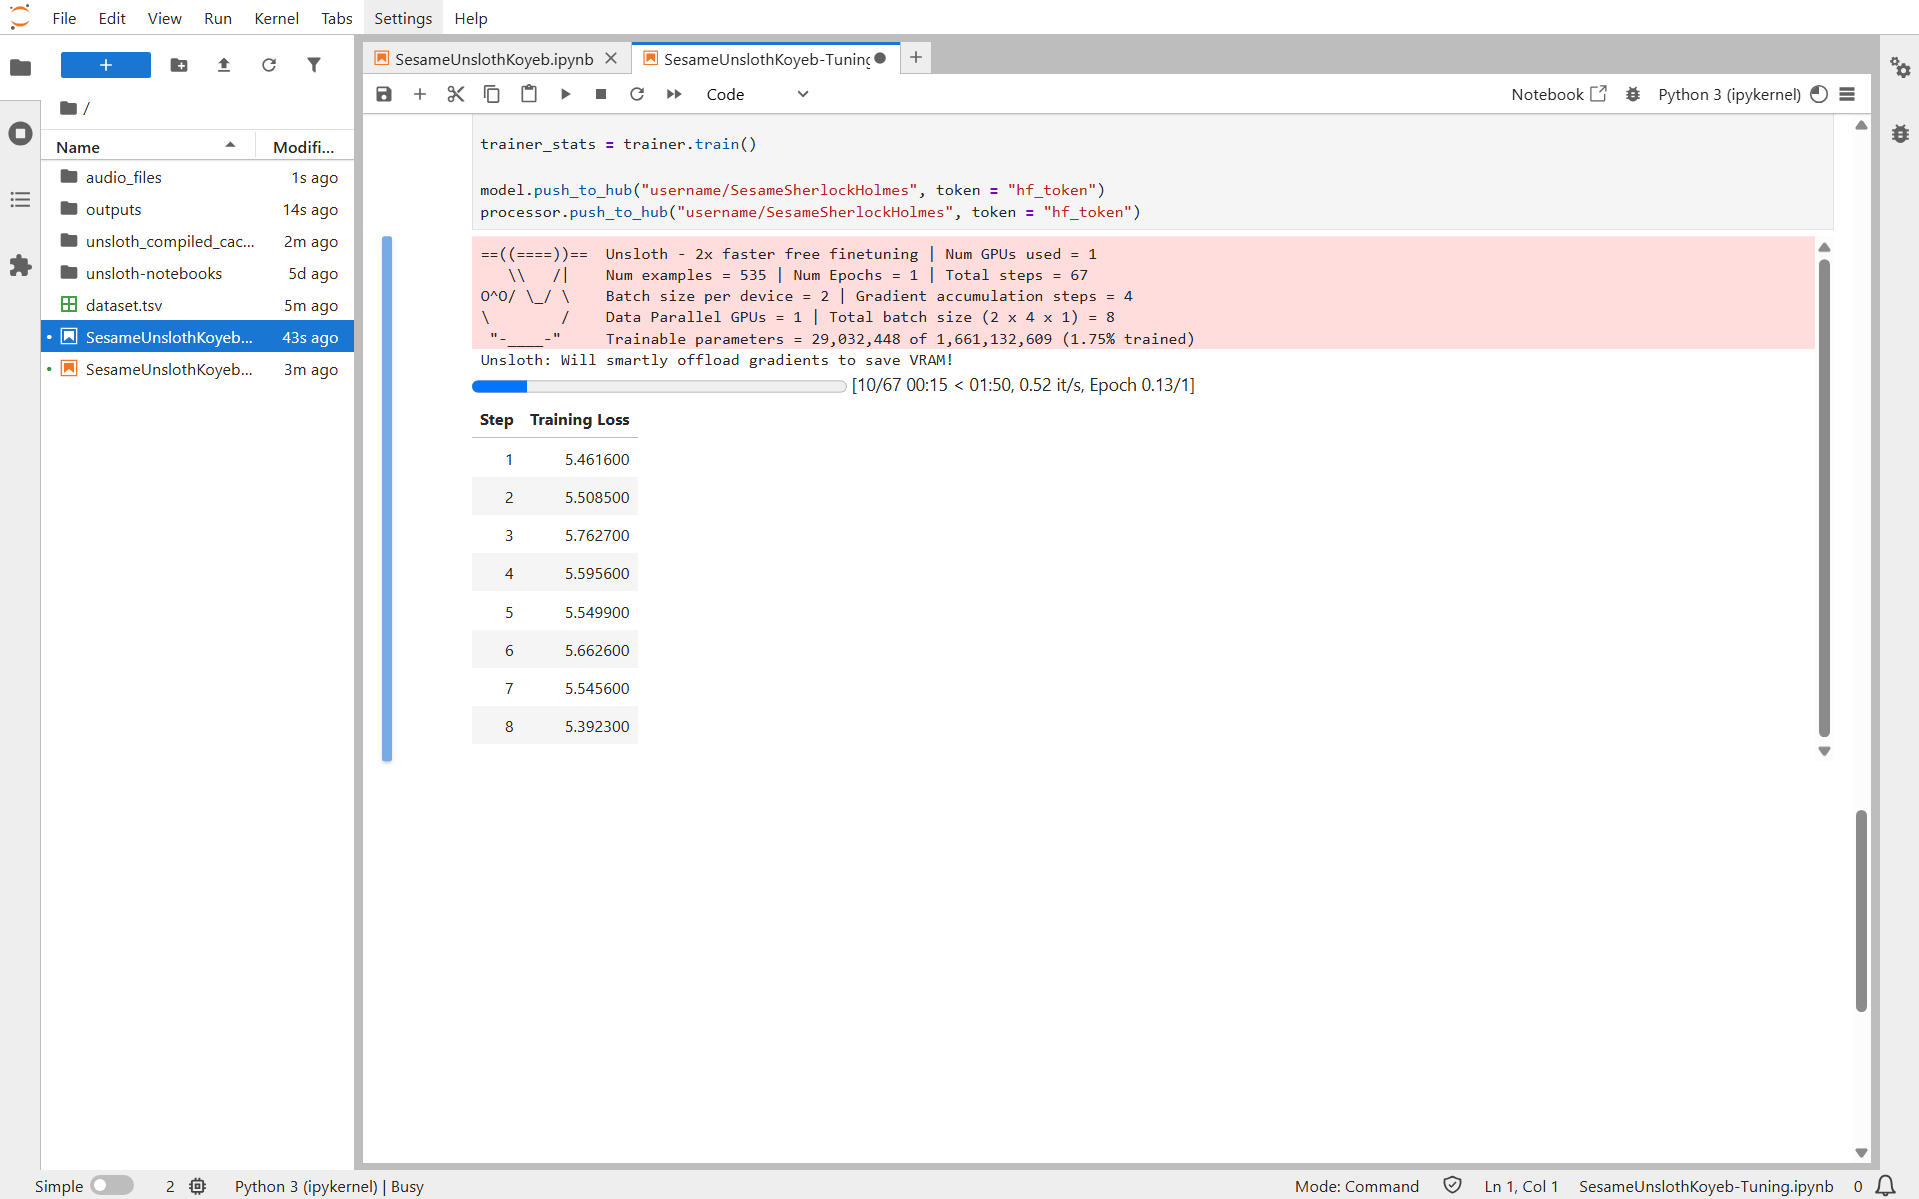
After a few minutes, the training completes and the custom model is automatically uploaded to Hugging Face:
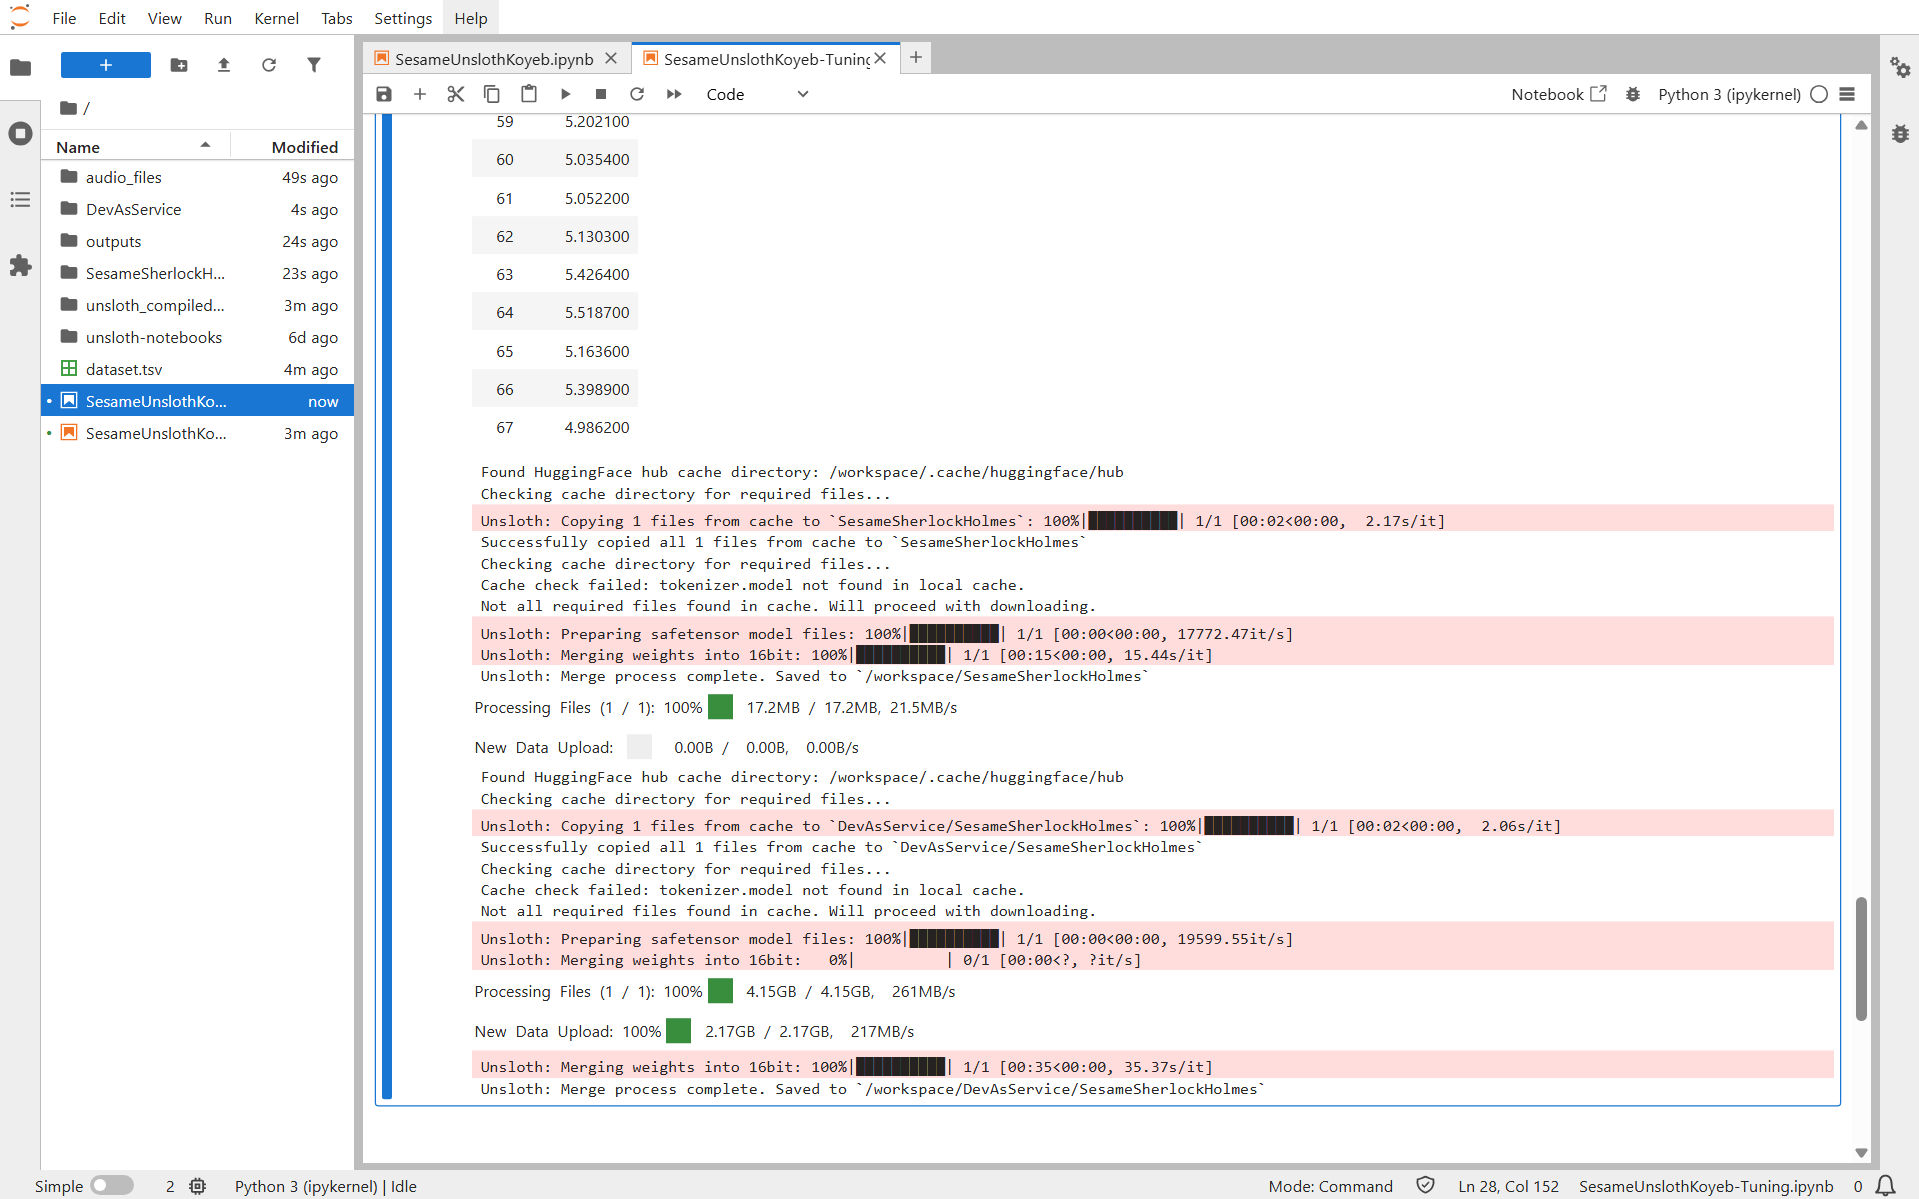
You have successfully fine-tuned a custom Sesame TTS model and deployed it to Hugging Face.
The process is very cost-effective: the entire dataset preparation and fine-tuning took less than 10 minutes and cost only $0.95 using the default NVIDIA L40S GPU. You can get started by signing up on Koyeb and claiming $200 in credits.
Creating the FastAPI endpoint and Gradio UI
Once your Sesame model has been fine-tuned and uploaded to Hugging Face, it’s time to make it available as a web service that anyone can use.
We’ll handle this in two parts, first by setting up a FastAPI backend, and then by creating a Gradio frontend to provide an interactive web interface.
Step 1 – FastAPI backend
The FastAPI backend will expose your model as an API endpoint.
It accepts text input, generates speech using the fine-tuned Sesame model, and returns the synthesized audio file as a response.
from fastapi import FastAPI, HTTPException
from fastapi.responses import FileResponse
from pydantic import BaseModel, ConfigDict
import torch
from transformers import CsmForConditionalGeneration, AutoProcessor
import os
import tempfile
from contextlib import asynccontextmanager

# Global variables for model and processor
model = None
processor = None
device = None

# Load the model on startup and clean up on shutdown
@asynccontextmanager
async def lifespan(app: FastAPI):
    """Load the model on startup and clean up on shutdown"""
    global model, processor, device

    model_id = "username/SesameSherlockHolmes"
    device = "cuda" if torch.cuda.is_available() else "cpu"

    print(f"Loading model on {device}...")
    # load the model and the processor
    processor = AutoProcessor.from_pretrained(model_id)
    model = CsmForConditionalGeneration.from_pretrained(model_id, device_map=device)
    print("Model loaded successfully!")

    yield

    # Cleanup
    print("Shutting down...")

# Create the FastAPI app
app = FastAPI(
    title="Text-to-Speech API",
    description="API for generating audio from text using SesameSherlockHolmes model",
    version="1.0.0",
    lifespan=lifespan
)

# Define the input model
class TextInput(BaseModel):
    text: str
    speaker_id: int = 0

# Define the generate audio endpoint
@app.post("/generate")
async def generate_audio(input_data: TextInput):
    """
    Generate audio from text

    Args:
        input_data: TextInput object containing text and optional speaker_id

    Returns:
        Audio file (WAV format)
    """
    try:
        # Prepare the text with speaker ID
        formatted_text = f"[{input_data.speaker_id}]{input_data.text}"

        # Prepare the inputs
        inputs = processor(formatted_text, add_special_tokens=True).to(device)

        # Generate audio
        audio = model.generate(
            **inputs,
            output_audio=True,
            max_new_tokens=2000,  # 🔧 increase this for longer outputs
            do_sample=True,       # adds a bit of natural variation
            temperature=0.8       # controls expressiveness
        )

        # Create a temporary file to save the audio
        with tempfile.NamedTemporaryFile(delete=False, suffix=".wav") as temp_file:
            temp_filename = temp_file.name
            processor.save_audio(audio, temp_filename)

        # Return the audio file
        return FileResponse(
            temp_filename,
            media_type="audio/wav",
            filename="generated_audio.wav",
            background=None  # We'll handle cleanup manually
        )

    except Exception as e:
        raise HTTPException(status_code=500, detail=f"Error generating audio: {str(e)}")

# Run the app
if __name__ == "__main__":
    import uvicorn
    uvicorn.run(app, host="0.0.0.0", port=8000)
Don’t forget to update the model_id variable in your code to match the name of your fine-tuned Sesame model on Hugging Face.
This ensures your FastAPI backend loads the correct model for generating speech.
Explanation:
- Model Loading: Uses a
lifespancontext to load the fine-tuned Sesame TTS model and processor from Hugging Face on startup. - API Endpoint:
/generateaccepts text and an optionalspeaker_id, formats it, and generates audio with sampling and temperature controls. - Audio Handling: Saves generated speech as a temporary
.wavfile and returns it viaFileResponsefor easy download or playback.
Step 2 – Gradio frontend
Gradio offers an easy-to-use web interface that allows anyone to interact with your TTS model directly in the browser, without needing to write any code. Users can type text and instantly hear the generated speech.
import gradio as gr
import requests
import tempfile
import os
from pathlib import Path

# API Configuration
API_URL = "<http://localhost:8000>"

def generate_audio(text: str):
    """
    Generate audio from text using the TTS API

    Args:
        text: The text to convert to speech

    Returns:
        Path to the generated audio file or error message
    """
    if not text.strip():
        return None, "Please enter some text to generate audio."

    try:
        # Prepare the request
        payload = {
            "text": text,
            "speaker_id": 0
        }

        # Send request to API
        response = requests.post(
            f"{API_URL}/generate",
            json=payload,
            timeout=60
        )

        if response.status_code == 200:
            # Save the audio to a temporary file
            with tempfile.NamedTemporaryFile(delete=False, suffix=".wav") as temp_file:
                temp_file.write(response.content)
                temp_filename = temp_file.name

            return temp_filename, "Audio generated successfully!"
        else:
            error_msg = response.json().get("detail", "Unknown error")
            return None, f"Error: {error_msg}"

    except requests.exceptions.ConnectionError:
        return None, f"Could not connect to API at {API_URL}. Please make sure the API server is running."
    except requests.exceptions.Timeout:
        return None, "Request timed out. The text might be too long."
    except Exception as e:
        return None, f"Error: {str(e)}"

# Create Gradio Interface
with gr.Blocks(title="Text-to-Speech Generator", theme=gr.themes.Soft()) as demo:
    gr.Markdown(
        """
        # 🎙️ Text-to-Speech Generator
        Convert text to speech using the SesameSherlockHolmes model.
        """
    )

    # Define the input and output
    with gr.Row():
        # Define the input
        with gr.Column(scale=2):
            # Define the text input
            text_input = gr.Textbox(
                label="Enter Text",
                placeholder="Type the text you want to convert to speech...",
                lines=5,
                max_lines=10
            )

            # Define the buttons
            with gr.Row():
                generate_btn = gr.Button("🎵 Generate Audio", variant="primary", size="lg")
                clear_btn = gr.Button("🗑️ Clear", size="lg")

        # Define the output
        with gr.Column(scale=2):
            # Define the status output
            status_output = gr.Textbox(
                label="Status",
                interactive=False,
                container=True
            )

            # Define the audio output
            audio_output = gr.Audio(
                label="Generated Audio",
                type="filepath",
                interactive=False
            )

    # Define the generate button
    generate_btn.click(
        fn=generate_audio,
        inputs=[text_input],
        outputs=[audio_output, status_output]
    )

    # Define the clear button
    clear_btn.click(
        fn=lambda: ("", None, ""),
        outputs=[text_input, audio_output, status_output]
    )

# Launch the Gradio interface
if __name__ == "__main__":
    demo.launch(
        server_name="0.0.0.0",
        server_port=7860,
        share=False
    )
Explanation:
- API Integration: Connects to your FastAPI backend (
API_URL) and sends text along withspeaker_idto the/generateendpoint. Handles errors such as connection issues or timeouts. - Audio Handling: Receives the audio response, saves it as a temporary
.wavfile, and returns the path for playback in the interface. - Gradio UI Setup: Uses
gr.Blocksto create a structured web interface with:- A textbox for text input.
- Buttons to generate audio and clear inputs.
- An audio player to play the generated speech.
- A status box to display success or error messages.
- Event Binding: The Generate Audio button triggers the
generate_audiofunction, while the Clear button resets all fields.
Step 3 - Dockerfile
To serve both your FastAPI backend and Gradio frontend in a single container, you can create a Dockerfile that installs dependencies, copies your application code, and runs both services.
FROM python:3.12-slim

WORKDIR /app

# Install system dependencies
RUN apt-get update && apt-get install -y \\
    build-essential \\
    curl \\
    && rm -rf /var/lib/apt/lists/*

# Copy requirements and install Python dependencies
COPY requirements.txt .
RUN pip install --no-cache-dir -r requirements.txt

# Copy the API and Gradio application
COPY api.py .
COPY app.py .

# Run the API and Gradio application
CMD python api.py & python app.py
The Dockerfile starts both the FastAPI backend and the Gradio frontend concurrently. The & runs api.py in the background while app.py runs in the foreground.
Deploying it to Koyeb
With the code ready, it’s time to deploy it to a GPU-powered environment on Koyeb.
First, create a new repository on GitHub, then run the following commands in your terminal to commit and push your project to that repository:
echo "# SesameUnsloth" >> README.md
git init
git add .
git commit -m "First Commit"
git branch -M main
git remote add origin [Your GitHub repository URL]
git push -u origin main
All of your local code should now be present in the remote repository. You can now deploy the application to Koyeb.
In the Koyeb control panel, while on the Overview tab, begin by clicking Create Service.
On the Service creation page:
- Select Web service.
- Choose GitHub as the deployment method.
- Select your repository. If needed, click Edit GitHub app permissions to grant Koyeb access to your repo.
- Choose a GPU instance (e.g., NVIDIA L40S) and select your preferred region.
- Adjust the port to 7860
Finally, click Deploy to launch your service.
After a couple of minutes your instance should be deployed. You can access it by navigating to the Public URL.
Note: The first load of the application might take a couple of minutes to start. This is due to the FastAPI application downloading the TTS the model, which should only last a couple of seconds.
Testing your AI voice
Now comes the moment of truth, let’s test our deployed Gradio web app and hear Sherlock Holmes speak!
Open your Koyeb public URL, type in any text, and click “Generate Audio.”
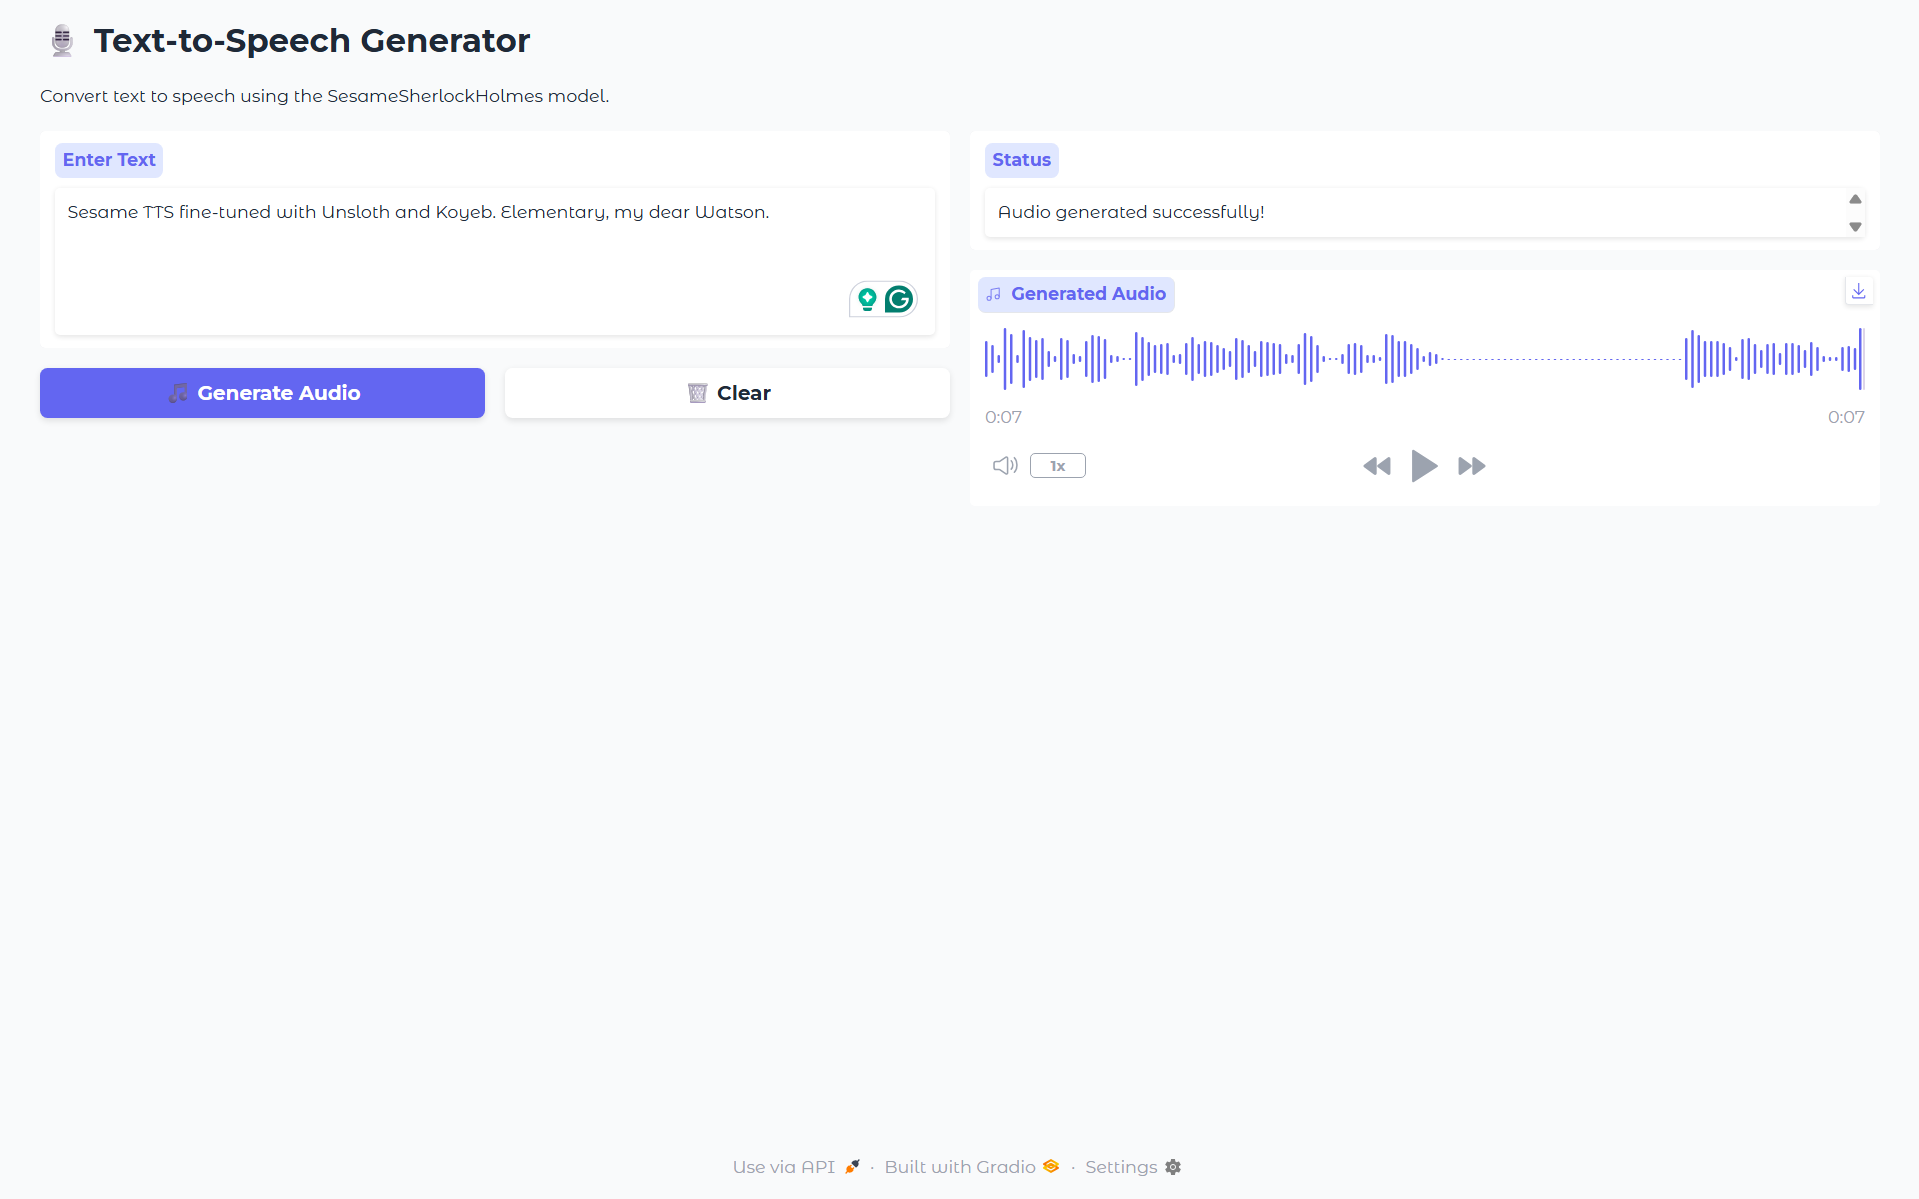
Within a few seconds, your custom Sesame TTS model will synthesize speech directly in the browser.
You can also listen to the sample output from our example here:
Conclusion & next steps
In this tutorial, we walked through the complete workflow for building a custom Text-to-Speech model.
We began by preparing a dataset from public domain audio, converting it to the appropriate format, splitting it into manageable chunks, and generating transcripts.
Next, we fine-tuned a Sesame model on this dataset using Unsloth’s tools, optimizing it for realistic speech generation.
Finally, we deployed the model with a FastAPI backend and a Gradio frontend, enabling users to interact with it easily through a web interface.
We encourage you to experiment and share your results. Showcase your custom voices and demos by tagging @unslothai, @gradio, and @koyeb, and inspire others in the community with your creations.