Add full-text search with MongoDB Atlas and MERN
Koyeb provides developers the fastest way to deploy full stack applications and APIs globally. Want to deploy your MERN stack application globally in minutes? Sign up today and deploy your first service!
Introduction
Search capabilities help users find what they are looking for as fast as possible. While traditional searches return exact matches, a full-text search provides an added level of flexibility when querying data because it returns results that contain some or all of the words from a query.
Thankfully, certain managed database providers like MongoDB offer a built-in full-text search feature. In this guide, we are going to enhance the blog application we created in the first part of this mini MERN series - Get started with the MERN stack: Build a blog with MongoDB Atlas - by adding full-text search with Atlas Search.
Since we deployed the application on Koyeb in the first guide, we will benefit from the platform's built-in continuous deployment. All we have to do is push our commits, and Koyeb will automatically build and deploy the latest version of our application.
Requirements
To successfully follow and complete this second and final part of the MERN series, you need:
- Built the app by following the first guide of the MERN series Get started with the MERN stack: Build a blog with MongoDB Atlas
- A local environment with Yarn and Node.js installed
- A MongoDB Atlas account for your managed MongoDB database
- A GitHub account to version and deploy your application code on Koyeb
- A Koyeb account running the application
Steps
To successfully follow this guide, you need to follow these steps:
- Set up Atlas Search
- Enhance the search API
- Add Search UI in the React app
- Deploy on Koyeb for built-in continuous deployment
Set up Atlas search
Upload the sample data
In order to take advantage of the Atlas search capabilities, we first need better sample data for our blog. Luckily, there are several online resources for this. I decided to use government blog posts shared on the platform Data.world. I cleaned the sample data, so it would seamlessy integrate into our web app. Instead of downloading the JSON file from the website, you can take it directly from my GitHub.
The first step to upload this data is to create a new database and collection using the Mongo Atlas dashboard. From the dashboard:
- Go to your database deployments
- Click on the "browse collections" tab
- Click on the left button "Create Database"
- Enter the new database and collection names. For example, I named my collection
posts.
To upload the JSON collection from your local device you need install the package "mongodb-database-tools". The following documentation provides easy steps for the most common OS:
In the terminal, run the following command:
mongoimport --uri mongodb+srv://USERNAME:PASSWORD@CLUSTERNAME.<>.mongodb.net/DB_NAME --collection COLLECTION_NAME --type json --file SAMPLE_DATA_PATH --jsonArray
Make sure to substitute the following:
-
The connection string with
USERNAMEandPASSWORDwith your personal user credentials.Note: You can retrieve your connection string by clicking the "Connect" button next to your MongoDB cluster name. Select the "Connect your application" option and copy your database connection string to a safe place for later use.
-
DB_NAMEandCOLLECTION_NAMEwith the name of the database you created andpostas the collection name -
SAMPLE_DATA_PATHwith the path to the index.json file on your laptop
If everything is set up correctly, you should see a successful message like 10 document(s) imported successfully. 0 document(s) failed to import. Head to the MongoDB Atlas dashboard again and open the collection, you should see the new sample data for our blog!
Create a search index
The blog search function will query the database for keywords within the title of a post. This means we are going to do a full-text search on the title and enable the autocomplete operators.
For this, we need to create a full-text search index on the title field. From the MongoDB dashboard for your cluster:
- Click on the "Search" tab
- Click "Create Search Index"
- Select JSON editor and "Next"
Replace the default definition with the following code:
{
  "mappings": {
    "dynamic": false,
    "fields": {
      "title": [
        {
          "foldDiacritics": true,
          "maxGrams": 15,
          "minGrams": 2,
          "tokenization": "edgeGram",
          "type": "autocomplete"
        }
      ]
    }
  }
}
You can see that we are creating an index of type "autocomplete" on the "title" field of our collection.
There are several configuration options available in the autocomplete data type, such as tokenization strategy and diacritic folding. A complete explanation can be found on the official Atlas Search documentation, but for the purpose of the tutorial we are using the following options:
foldDiactrics: When true, diactricts are included in the index.maxGramsandminGrams: Respectively maximum and minimum number of characters per indexed sequence.tokenization: edgeGram tokenizer tokenizes input from the left side, or "edge", of a text input into n-grams of given sizes.
Name your search index for easy reference and select your database and collection collection, then click "Next".
After you reviewed your newly created index, click on "Create Search Index" where you will be redirected to the "Search" tab. The index creation takes about a minute and when it is ready, its status will automatically change to "Active".
Build the aggregation pipleline to filter the posts: using $search, $limit and $project
In your MongoDB Collection, click on the tab "Aggregation". We are going to create and test your query. The amazing part of the aggregation UI is that, for every stage in the pipeline, they show you the result directly form the posts collection.
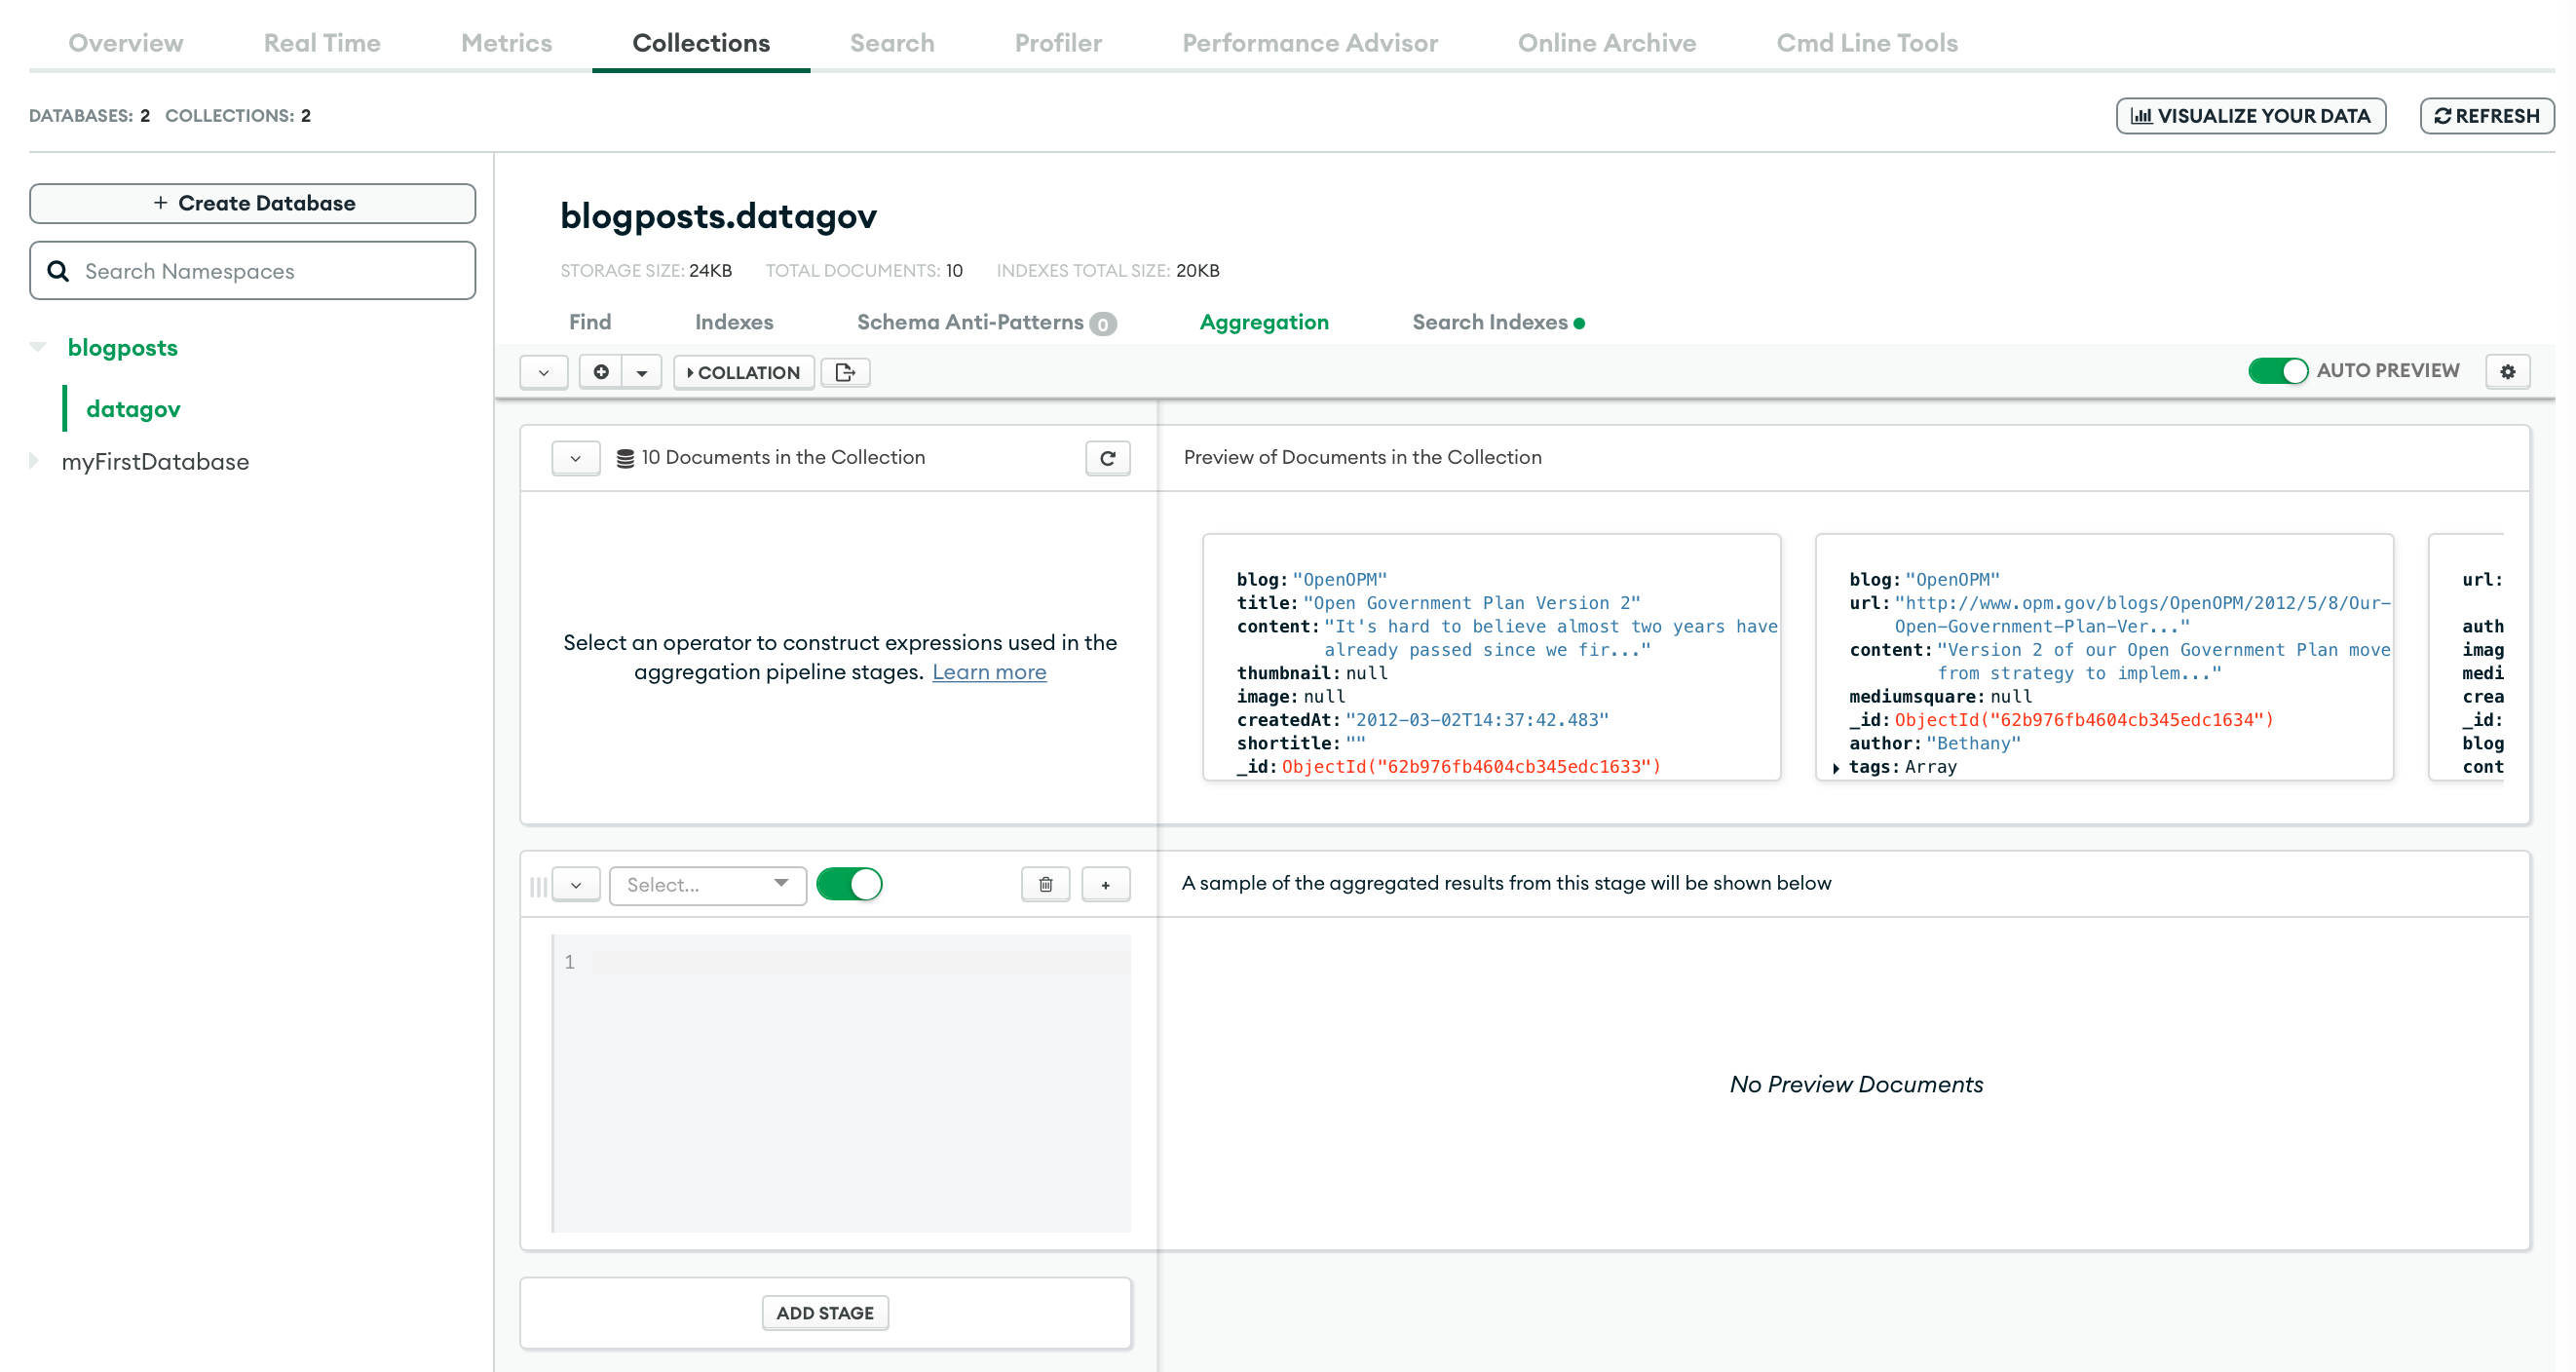
Our aggregation pipeline is composed of 3 stages/parameters:
$search: We define the index to use, the autocomplete option, the field and the query itself.$limit: We can decide to limit the result number.$project: What kind of fields to return for each post entry.
Whenever we add a stage, the aggregation pipeline will run and return the result in real-time.
Using $search
The first step is to use $search. The search operator lets you perform full-text searches. Find and click on it in the dropdown menu. A basic syntax structure will show up for you to populate:
{
    'index': 'title_autocomplete',
    'autocomplete': {
      'query': 'open gov',
      'path': 'title',
    }
  }
- Assign to
indexthe name of the index we have just created. - Since we are using the autocomplete option, replace
textwithautocomplete. querycan be an example of a search query for now.pathis the field to search upon.
Once done, you should see the UI to automatically query the collection and return the list of blog posts that satisfy the conditions above.
Using $limit
Using $limit, we can simply return a subset of the result by returning only the top posts. In the aggregation UI choose $limit and enter 5 for example.
You should see the number of posts be limited to 5!
Using $project
With $project, we can tell the query to return a subset of the posts fields. Choose $project in the dropdown and add the following code:
'_id': 1,
'title': 1,
'author': 1,
'createdAt': 1,
The value of "1" tells the pipeline that we want to include specific fields. Based on the query, we want to return the post _id, title, author and createdAt. These are the only 4 values we need to show on the blog homepage.
For fun practice, you can go ahead and tweak the values of each stage and see how they affect the final result.
Finally, Atlas UI provides a handy function to quickly export the aggregation with the right syntax of several languages, Node.js included. Under the "aggregation" tab and beside the "collation" button, click on the export pipeline and choose Node.js. Here is the resulting aggregation code:
{
         '$search': {
           'index': 'title_autocomplete',
           'autocomplete': {
             'query': 'open gov',
             'path': 'title',
           }
         }
       }, {
         '$limit': 5
       }, {
         '$project': {
           '_id': 1,
           'title': 1,
           'author': 1,
           'createdAt': 1,
         }
       }
Notice that we still have a hard-coded "open gov" value for "query". In our backend endpoint, we are going to replace it with a dynamic search value coming from the search bar that we are building in the client.
Enhance the search API endpoint
Return to the server code. We currently have a GET endpoint /api/blogs that queries the database and returns the full list of blog posts. We are going to extend its capabilities by:
- Adding a search query parameters which contains the query from the client search bar
- Adding extra logic when the search parameter exists
Run the aggregation
When a user reaches the blog homepage, the search bar is empty so that the very first API call will not send any search parameter, the endpoint will return the whole list of posts and
typing on the search bar will trigger subsequent API calls including the extra search params. In our case, the endpoint will not return the whole list of posts but instead will use the aggregation function on mongoose to search for the right posts.
Here is the new code for the first API endpoint in /routes/posts.js:
/* GET posts */
router.get('/', async (req, res, next) => {
  // We look for a query parameter "search"
  const { search } = req.query
  let posts
  if (search) {
    // If search exists, the user typed in the search bar
    posts = await Post.aggregate([
      {
        $search: {
          index: 'title_autocomplete',
          autocomplete: {
            query: search, // noticed we assign a dynamic value to "query"
            path: 'title',
          },
        },
      },
      {
        $limit: 5,
      },
      {
        $project: {
          _id: 1,
          title: 1,
          author: 1,
          createdAt: 1,
        },
      },
    ])
  } else {
    // The search is empty so the value of "search" is undefined
    posts = await Post.find().sort({ createdAt: 'desc' })
  }

  return res.status(200).json({
    statusCode: 200,
    message: 'Fetched posts',
    data: { posts },
  })
})
With this change, we have now added search capabilities to our Node server.
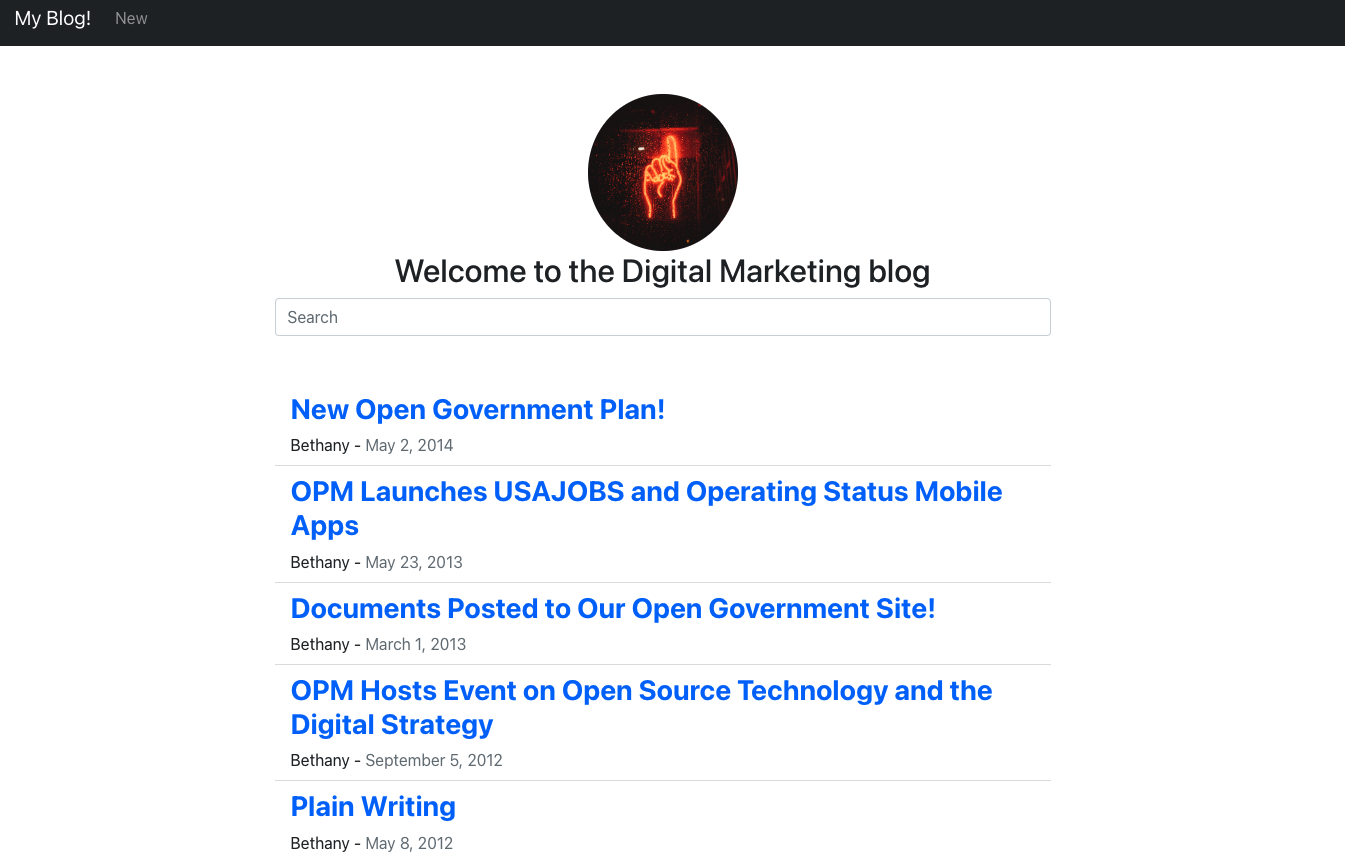
Add Search UI in the React app
The second to last step of the tutorial is to add the search bar to the homepage of our client.
As we are using react-boostrap, all we need to do is import Form and FormControl components. Then, we are going to attach an action listener on "onChange" events to call our backend whenever a user inputs anything in the search bar.
Open home.js inside /client/src/pages and add the following code:
import { useEffect, useState } from 'react'
import Container from 'react-bootstrap/Container'
// Here we import the new components for the seach bar
import Form from 'react-bootstrap/Form'
import FormControl from 'react-bootstrap/FormControl'
import Image from 'react-bootstrap/Image'
import ListGroup from 'react-bootstrap/ListGroup'
import { Link } from 'react-router-dom'

import formatDate from '../lib/formatDate'
import http from '../lib/http'

const Home = () => {
  const [posts, setPosts] = useState([])
  useEffect(() => {
    async function fetchData() {
      const { data } = await http.get('/api/posts')
      setPosts(data.data.posts)
    }
    fetchData()
  }, [])
  /* We are creating a new function that calls the API endpoint
     and passing the search value as a query parameter
  */
  const searchPost = async (e) => {
    const searchValue = e.target.value
    const { data } = await http.get(`/api/posts?search=${searchValue}`)
    // The subset of posts is added to the state that will trigger a re-render of the UI
    setPosts(data.data.posts)
  }

  return (
    <>
      <Container className="my-5" style={{ maxWidth: '800px' }}>
        <Image
          src="avatar.jpeg"
          width="150"
          style={{ borderRadius: '50%' }}
          className="d-block img-fluid mx-auto"
        />
        <h2 className="text-center">Welcome to the Digital Marketing blog</h2>
        // Let's add the search bar under the subheader
        <Form>
          <FormControl
            type="search"
            placeholder="Search"
            className="me-5"
            aria-label="Search"
            onChange={searchPost} // onChange will trigger "search post"
          />
        </Form>
      </Container>
      <Container style={{ maxWidth: '800px' }}>
        <ListGroup variant="flush" as="ol">
          {posts.map((post) => {
            return (
              <ListGroup.Item key={post._id}>
                <div className="fw-bold h3">
                  <Link to={`/posts/${post._id}`} style={{ textDecoration: 'none' }}>
                    {post.title}
                  </Link>
                </div>
                <div>
                  {post.author} - <span className="text-secondary">{formatDate(post.createdAt)}</span>
                </div>
              </ListGroup.Item>
            )
          })}
        </ListGroup>
      </Container>
    </>
  )
}

export default Home
Thanks to this new code, we added search capabilities to our blog with only a bit more than 10 lines of code!
Render posts content as HTML
The last code change in the client is a pure UI enhancement in the post.js page that handles the new format of a post content. When we imported the dataset from data.world, the content contains some HTML code for symbols such as commas, semicolons, etc.
Open post.js inside /client/src/pages and change the following line of code:
from
<div className="h4 mt-5">{post.content}</div>
to
<div className="h4 mt-5" dangerouslySetInnerHTML="{{__html:" post.content}}></div>
By injecting HTML, we are going to show the symbols used in the content in the correct format.
Deploy on Koyeb for built-in continuous deployment
Finally, you just have to commit your changes with git and Koyeb will trigger a redeployment of the app with the new search functionality!
Conclusion
Congratulations for finishing the second and last part of the MERN tutorial!
In this second part, we successfully indexed our posts collection to make use of Atlas Search capabilities. We also created an aggregation pipeline with autocomplete to add search functionalities to your blog. During the pipeline creation, we played with $search, $limit and $project to create a basic aggregation that satisfies our requirements.
Then, we tweaked our server and client code to allow users to query the blog's database and search for posts by title.
If you want, you can read more about MongoDB Atlas Search and its different features and capabilities here.
The last step was deploying the newest code, which was easy because it was once again handled by Koyeb. Koyeb is making it extremely simple for developers: Just commit your code and Koyeb will trigger the redeployment.
If you would like to read more Koyeb tutorials, checkout out our tutorials collection. Have an idea for a tutorial you'd like us to cover? Let us know by joining the conversation over on the Koyeb community platform!